Showing posts with label Tutorial. Show all posts

Monday, May 4, 2015

Princess Leia Costume Tutorial


A Princess Leia costume has been on my mind since we found out we were having a daughter. As a family that loves Star Wars it was a must. And Princess Leia has always been my favorite. But this cute girl might just grow up and prefer Padme. 

Baby girl's big brothers were so excited to see her dressed as Princess Leia. Thanks to our ABC Star Wars book I am pretty sure she knew who she was.

Princess Leia Tutorial

Supplies:

White jersey material
Interfacing
Pleather
Grey paint
Thread
scissors
Brown felt
Brown elastic
Fabric Tac
Silhouette

 Start with your jersey knit. Using an existing dress as a guide cut out the tank dress shape and cut two pieces, front and back. You want it to be bigger and be able to drape. Sew right sides together (with the correct sides of your material together)  at top and on the sides as in the first picture above.

Measure the arm holes. Fold your material so that one side is the same measurement as your armpit measurement. Sew your material rights sides together. I then cut this tube in half making two sleeves.

Match your sleeve seam with your seam on the side of your dress. Sew them together, careful to match the right sides together. I like having my sleeve with the right sides out. I then slip it itno my dress which is inside out. Then I sew matching my bottom seams. Repeat this with the other sleeve.

Turning your Dress around I cut a slit from the top of the dress ON THE BACK PIECE ONLY. This gives an opening for putting on your dress.

For your top of your dress measure the width from the back corner piece all the way around to the other back corner so you are measuring the length of the top of your garment.  Use this measurement to cut a long strip of both jersey and interfacing.

Apply your interfacing. Fold this piece together. Take raw edges and pin them to the raw edges on the top of your dress. Sew them together so you can turn up your collar. I made my piece too high and made her look like a priest ;) So be careful not to make it too big. Use two pieces of ribbon and sew them to the back of your garment where the closure piece would be. This way you can adjust your dress in case she grows.


I left the edges raw because knits can handle that. And we are making this dress during the rebellion! Who has time to finish off hems. We have a super stations to destroy.

For the belt cut out a piece of white leather or leather like material. I used my Silhouette to make three circle stencils. Paint the circles grey. Cut strips of jersey material and sew them to the end of your belt, with right sides together.


For her cute buns we using brown felt. Using a leftover circle cut for my son's birthday banner I made a circle to trace two large brown circles. I made mine pretty large because I am pretty sure the real Leia had hair extensions. I then cut strips of brown felt using my rotary blade. I braided those pieces and glued them to my large round circles, arranging them so you couldn't see the ends. Glue in place with fabric tac

Measure your headband for your daughter and clue together. Mark where you want her 'buns' to go making sure them cover her ears. Glue them together. 


There you have it! An adorable little Leia all set for May the 4th, Halloween, or just playing around the house. I love having dress up clothes with strong female characters. Now we just need to work on how she is holding that gun. 
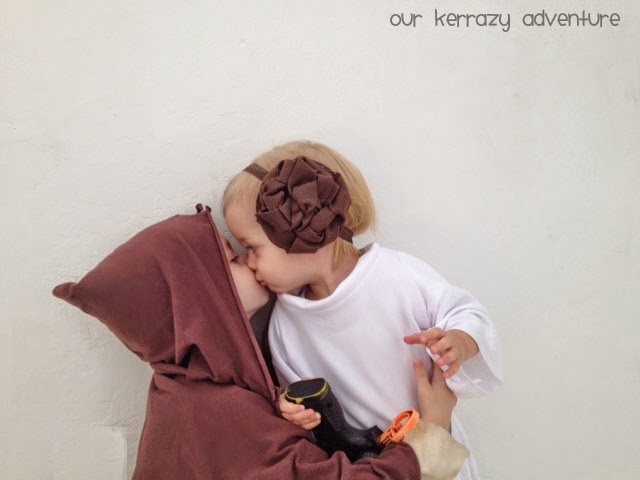

My little Yoda was more than happy to jump in as Luke Skywalker for this shoot. Baby girl was so excited to see he had his light saber. I love this one of them kissing. Her 'buns' look so cute. Maybe this photo took place before he knew she was his sister. ;)

Click HERE to see our fun Star Wars traditions for May the 4th...

Some of these items are affiliated links. You are welcomed to buy from anywhere. But I don't mind if you buy them from here. I only share items I really like or use. Thanks for your support!

Tuesday, April 21, 2015

Cutest Little Demi god Ever....


Isn't she the cutest little demi god ever???

Our family is loving the Percy Jackson series we started reading to get ready for our oldest boy's birthday party. We are almost done listening to the 4th book. If you haven't read the series you really should. It's funny and action packed. Another thing I love about it is their strong girl character Annabeth. 

Annabeth is the daughter of Athena so she's pretty smart. She is up for adventure, tough, and is a great loyal friend. I know baby girl is going to really like her when we read this series again when she is older. Who doesn't love it when the girl saves the day? (Though I have heard she is a little more damsel is distress in the movie)


I made each of my boys a "Camp Half Blood" shirt along with this cutie girl. You can find the image here. I just love having a Silhouette!!! Baby half blood shirts are hard to come by. Annabeth has blonde hair and wears it in a side braid. We did the best we can with that. She also has a New York Yankees cap, a gift from her mother. You can order one from the link  up above or you can make one. Perfect when you are making it the night before and don't have time for amazon's amazing 2 day shipping.


I found a blue hat at Walmart. It had a small orange horse on it. I have no idea what that stands for. Using my Silhouette I made the New York image and cut it on white fabric with interfacing ironed on to it. Use your Fray Check on the edges and glue that bad boy on. I made sure it was thick enough to cover the small horse.


She LOVES her hat. She wants to wear it all the time. Which I really don't mind considering how cute she looks. Also, she loves matching her brothers with this shirt. She didn't want to take her shirt off even when it was covered in yogurt. I had to distract her and then hide it real quick.


I love reading with this girl. I can't wait to read chapter books with her.

Happy Reading!!!


Check out more fun Percy Jackson Posts...


Monday, April 20, 2015

Thrift Store Find Makeover


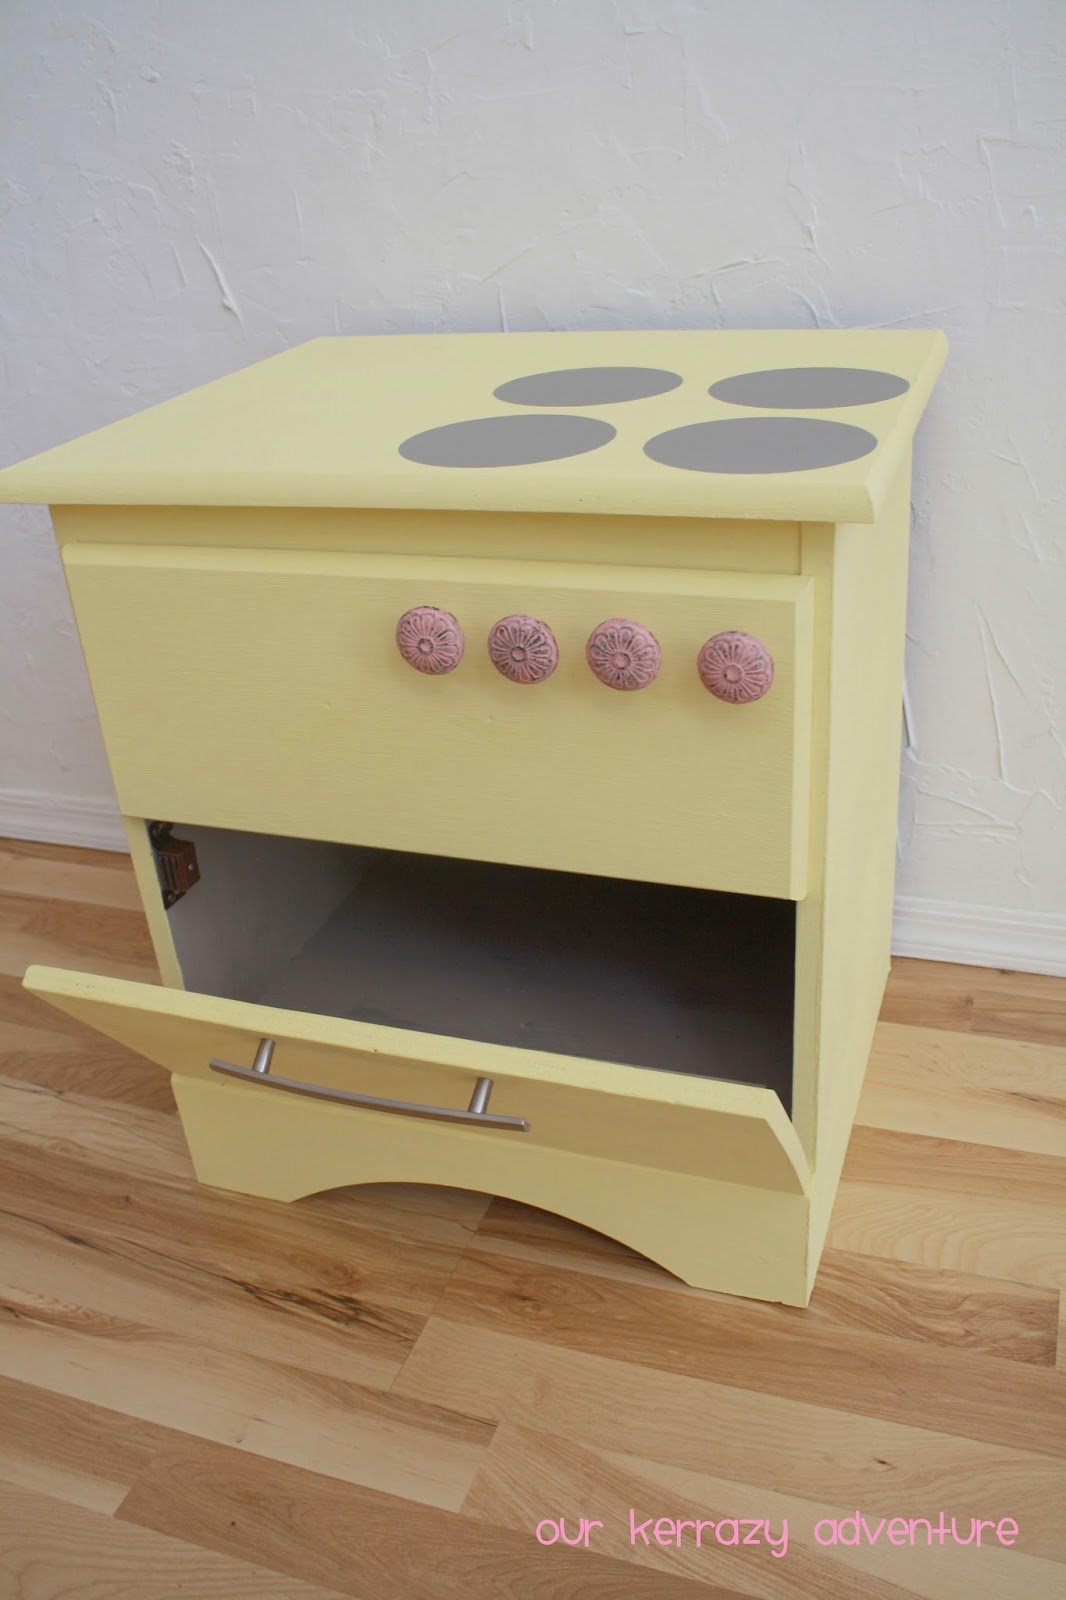
I found this great Thrift store in the East Valley area. It's called 360 Thrift. I really needed a little play table for baby girl. It would be perfect therapy for her to stand and play at a table to help strengthen her legs. Not only did I find one for only $1.99 I also found this gem...


Isn't it perfect!!! I have been driving around on Mondays looking for something just like this on my treasure drives. I recently came across this post from the Crafting Chicks. (I love their site) It has a link to kitchen plans from the amazing Ana White. She has so many great building plans to make pretty much anything. I love the homemade kitchen. And a darling kitchen set for $127 was a pretty fair price. But honestly that's not really in my budget right now. But I was totally inspired by her designs and I thought I could save some money by making my own.

And then I was lucky enough to find this gem at the thrift store.


 Supplies:

Nightstand (Or whatever else you can modify)
Drill
scrap wood
paint
Stove knobs
Oven drawer pull
Cameo
Saw
Ruler

First step was to paint this awesome piece I found. I almost went with a teal for a retro kind of feel, but this yellow makes me happy. I used Deco Art American Chalk Paint in Delicate.

Deco Art Americana Chalky Finish Paint, 8-Ounce, Delicate
I got it at Hobby Lobby. Next I measured what size I wanted my oven door. The bottom area of the night stand has a lip. It made the hinge part kind of tricky. I decided to get hinge that closed into itself, not just your basic hinge. I also needed to install a magnet to help hold it closed. There was another hinge option that would have helped the oven open fully but I wasn't sure my 1 year old would be strong enough to open that one. I had to add a piece of wood to help the hinge lay flat. I also didn't use the screws that came with the hinge. I used smaller ones for the door. And larger ones to secure it to the base of the night stand.


You can see here my hinge and magnet placement. Add you drawer pull to your oven door. I had to drill holes in first before I was able to get my screws in the wood.


Using my Silhouette I made a stencil for painting on burners. It was quick and easy. I wanted to leave some of the top for a prep area. Ikea has some really cute felt food and dishes. I think she will like having some room to "slice" fruits and veggies.


Lastly I added some adorable knobs from Hobby Lobby. The pink knobs are too cute. And I am thinking I want to make some pink/yellow dish towels for her new kitchen. I might even add some hooks on the side. I just LOVE how it turned out....


The drawer is perfect for storing pots and pans. I pulled out these dishes I had bought for my boys long ago. Even Draco and Yoda loved pretending to cook dinner. I love seeing my kids play together and use their imaginations. Wish I would have made one of these for my sons years ago.


You can paint this project any color and have it fit your budget. I love how sturdy and darling it looks. Now I am on the hunt for another piece I can make into a sink. 


Total Price:

Night Stand $3.99
Paint $8.99
Knobs (4) $3.99 each
Drawer pull $4
Hinge: $2.20
Double Magnetic catch: $2.50
Oven door: Free. Thanks to our Monday treasure hunts

Total about $32 with coupons 

Best part is seeing our baby girl cook, stir, and having fun while working on standing. And now we can work on getting her to walk from her new table to her new stove.

Other fun project where I have used free wood I have found on the side of the road.


Linked up Here  Check out other fun finds!!

Some of these items are affiliated links. You are welcomed to buy from anywhere. But I don't mind if you buy them from here. I only share items I really like or use. Thanks for your support!

Simple Little Coat Rack Tutorial


I bought a coat rack years ago at TJ Max. I really love that store. And I liked the coat rack I got. Hooks are so much easier and a must for kids. But it was made from pressed wood and the back hardware fell off after a couple of weeks. I tried several times to fix it or nail in new hardware, but nothing was working.

Then I thought I just need to make one. Really it's not that hard. On one of my Monday treasure hunts I scored this free piece of wood. (The first Monday of the month where I live people set out things they don't want) I cut the wood to fit the space I had for it. Originally I was going to paint it but I love the way the wood looks.

I was at Home Depot for one of their Kids Workshops. I had met my cub scouts there so we could passed off Achievement 5e. I was able to pick up these hooks for around $10. I had all the other supplies on hand. I love when I don’t have to spend much on a project.

Supplies:


  • Piece of wood
  • Stain or paint
  • vinyl stencil or decal (optional)
  • Hooks
  • Drill
  • Ruler
wax
  • Hard ware for the back to hang it up


  • Cut your wood and sand as needed. Stain or Paint your wood. Then measure out where you want to screw in your hardware. I had to use a drill bit to make a small hole so my screws could go in easier. Careful not to make your holes so big that the screws won't actually screw in. I’m not an expert in using a drill. And one of my hooks isn’t quite perfect but I’m okay with it. And I remind my sometimes OCD brain that when I see it.


    This rack is next to our garage door and it is where we leave every morning. It's perfect for my purse, the kid’s backpacks, and jackets. One thing that we need to be better at is morning prayers. We are pretty good at praying in the evening and before dinner. But our mornings are really crazy. My kids never can seem to find their shoes or clothes. Really they just wanna play and read and not get ready for school let alone church. All that extra clothing like belt and ties makes life that much harder.

    Family prayer is essential. I want to have a chance to pray as a family before I send my children off in the world. They need that protection. That's why I added a small little saying "Did you think to Pray?" (I love that song) That way when I grab my purse or the boys grab their backpacks we can have a reminder that we need to have a family prayer.

    Really you could skip a saying. Or add your family name or a saying like "Be Kind" or any other message you want your kids to see. I like that it isn't flashy, but just a small reminder.


    Originally I had the saying higher but my sweetheart thought it would look better lower and I quite agree. I was blessed to get a Cameo Silhouette and was able to make my stencil. Then I used leftover paint from my dresser. If you don't have a silhouette and need a place to get vinyl there is a great etsy shop Little Mrs Crafty. She does a great job and can get you what you need. She makes toilet targets for little boys. They are too cute.

    When I was finished I sealed it with wax and hung it up. I am happy with how it turned out. I love how solid and secure the wood is. Going weeks with the back packs on the ground was driving me crazy. And I am hoping it helps us remember our family prayers in the morning.


    Thanks for reading! Hope I can help make your home a little more organized.

    Wednesday, April 15, 2015

    Percy Jackson Cake Tutorial


    My son's Percy Jackson party was so much fun! I am loving this book series right along with my three sons. When I was searching for ideas for decorating his cake I was seriously impressed. There are some really cool cakes out there. Most of them well above my skill level.

    I do love the ombre effect on cakes. A fairly simple task of adding more dye to each section. That is when I thought I would try and mimic waves from the ocean. But I was still stumped on what to do on the top. I thought about bunting or just writing out his name, but then I thought a trident would look great on top and it would stay with our theme.

    I love using cookie cutters to stamp out fondant. But I really didn't want to buy and try to find a trident cookie cutter. That's when I got this idea. I don't know why I didn't think of it before. I'll cut out a shape with my Cameo Silhouette on card stock and use it as a template.

    Really You can cut out anything. Some one's name. A fox. Pikachu. Giant lips. A tardis. The options are endless.

    Decorating a Cake using A Silhouette

    Fondant
    Small paint brush
    Pizza cutter
    paring knife
    Roller
    Powdered Sugar
    Crisco
    Small bowl of water
    A template made from your Silhouette

    First you need to make your cake. These are a huge help! I bought them years ago. They fit around your pan and help your cake bake more evenly and level. I just used a box cake this time but substituted milk for water and butter for oil. I was able to do this a few days before to save time.

    You can either buy or make your fondant. I love How Does She's fondant recipe. I have used it a couple of times. And it's super yummy. She also has tips for frosting a cake.

    Once my fondant was made and my cake was frosted with a yummy butter cream frosting it was time to get to work. I divided my fondant into three amounts, well 4. I had a small ball for the trident on top. At first I was going to do three shades of blue, but because I was short on time I thought I would leave one white. Ocean foam is white, right? Leave some for your design on top. And then divide into three sections. Color them their desired color. Wrap them back up till ready to work with them.

    Roll your fondant into a fat little worm and then roll it out lengthwise with your roller. I love my Pampered Chef roller. I then used my Pizza Cutter and free handed a little wave.


    Dip your paint brush into your bowl of water to help the fondant stick. Starting at the top wrap it around your cake. Because I was working from a idea in my head I didn't start as high as I would have liked. If I were to do it over I wouldn't have the top part of the cake showing at all. Keep working around the cake doing one color at a time. I liked finishing row by row and varying my "waves" by putting low and high points near each other.


    Some parts were a little cracked. I just painted a little extra water to smooth them out as pictured above. As you are finishing up on the bottom row cut the bottom in a straight line so it lines up nicely with your cake platter. Though it might be smarter to fix this before you put it on your cake.


    Cut out your design using your Silhouette, or free hand if you don't have one yet. Using a paring knife trace your design.


    I wanted my trident to have a longer staff so I improvised.

     
    Clean up any edges with your knife. I laid my fondant design on my hand and then carefully placed it on my cake. Get an idea where you want it before you pick it up.  Also I picked my best display of my waves and made sure to make that the front of my cake. You can also use a rolling pin and drape it over and then place it on your cake.


    Adjust if you need to. Try not to move it around too much or your frosting can move around as well.
    And don't get too discouraged if it doesn't turn out perfect. I made this cake for Draco 2 years ago. It so wasn't perfect, but boy did his face light up when he saw it. Making cakes is a labor of love. And I am sure whom ever you are making your cake for will absolutely love it!


    It will look even better on a Dollar Tree tablecloth. For more Percy Jackson party ideas click HERE. If you do make these waves or use a stencil for your cake share your link in the comments. I love seeing other cake creations! Thanks again!

    Some of these items are affiliated links. You are welcomed to buy from anywhere. But I don't mind if you buy them from here. I only share items I really like or use. Thanks for your support!

    Tuesday, March 24, 2015

    Cheater Bow Ties: An Easy Tutorial


    I love it when my boys match. Especially for church or holidays.It's too adorable. But I don't always have time to make them matching bow ties. And regular ties take even more tie and material. I really wanted to make them some green bow ties for St. Patrick's Day, along with a dress for baby girl. But I couldn't squeeze it in.


    I just love hounds tooth!


    I made some for Christmas using these. I liked them but sometimes my youngest boy's bow tie just didn't stay on for the whole three hours at church. Then I got a great idea. Why don't I just make a simple bow tie and put it on a ribbon. That is the most time consuming part for me. Sewing thin strips, ironing, and attaching the hardware or Velcro. If I could just make a bow and slip that sucker on a ribbon my life would be so much easier. Here is the tutorial. Hoping I can make your life easier too...


    Cheater Bow Tie Tutorial

    Material
    Thread
    Scissors
    Ribbon
    Needle
    Pins
    Sewing Machine
    Fray Check
    Cutting Mat and Rotary blade make it easier.


    Start with cutting two long rectangles. Mine were 3.5 inches by 10 inches. Sew rights sides together around like so.


    Turn it out using a pencil or drum stick. Press when done.


    Fold the ends behind so you have a smaller rectangle.

    Cut out two smaller rectangles. Mine was around 3.5 " by 2". Sew two side together and turn right sides out. Press. I ended up folding it in half to make it thinner. Get a needle ready with a knot at the end.

    Pinch the middle of your large rectangle.


    Wrap your smaller rectangle around the middle. When bringing down the top piece, keeping the ends behind your bow, I like to tuck the unfinished end under. 


    Using your needle stitch the smaller rectangle in place. You can sew them togeher but be careful not to have any stitches showing from the front. 


    You can use a safety pin to pull the ribbon through your back of your bow tie. Finish off your ribbon ends with Fray Check so it won't fray.


    Tie around your son's neck and tuck the edges in like so.

    I was able to make 3 of these in about an hour. Perfect during nap time or when the kids are in bed. I can't wait to make more for my boys. Using a rotary blade and mat really saved time as well. I love my big mat from Fiskars. They were a sponsor at the Elevate Blog last year. I received scissors and this huge mat which really helps me as I am a visual learner.


    I love picking colors for Easter. This year the colors are Blush and Bashful. Some might say Pink and Pink, but I would disagree. I bought this dress at Old Navy last month. I just love the soft spring color. Baby sister needed her brothers to have matching bow ties. (Daddy might just have one too!)

    Every one of my boys made a comment about the pink, including Dad. I tired to tell them it's Bashful. My sons are in a anti girl stuff phase right now. I told them there is no such thing as a boy or girl color. I can't wait to get some pictures of them this week.

    I needed these ready by this weekend because Easter is falling on General Conference this year. Glad they are made and I wasn't caught off guard.


    I hope you get a chance to make a quick bow tie or two. Happy Sewing!!!


    Some of these items are affiliated links. You are welcomed to buy from anywhere. But I don't mind if you buy them from here. I only share items I really like or use. Thanks for your support!